Ardunio Relay : Amazon Com Tolako 5v Relay Module 5v Indicator Light Led 1 Channel Relay Module For Arduino Arm Pic Avr Mcu Computers Accessories / A relay accomplishes this by using the 5v outputted from an arduino pin to energize the electromagnet.
Dapatkan link
Facebook
X
Pinterest
Email
Aplikasi Lainnya
Ardunio Relay : Amazon Com Tolako 5v Relay Module 5v Indicator Light Led 1 Channel Relay Module For Arduino Arm Pic Avr Mcu Computers Accessories / A relay accomplishes this by using the 5v outputted from an arduino pin to energize the electromagnet.. In the past, i used to build a circuit just like the above. Controlling a relay module with the arduino is as simple as controlling any other output as we'll see there are other relay modules that are powered using 3.3v, which is ideal for esp32, esp8266, and. First we will control a simple led then we will control a light bulb using it. * a relay basically allows a relatively low voltage to easily control higher power circuits. The ratings are usually printed on the relay case.
Unfortunately, you can't as the arduino operates at 5v which means it can't control these higher however, with the help of a relay module to switch the high voltage, you can now use the arduino to. A relay accomplishes this by using the 5v outputted from an arduino pin to energize the electromagnet. In the past, i used to build a circuit just like the above. We will control two different devices using it. In this tutorial you learn
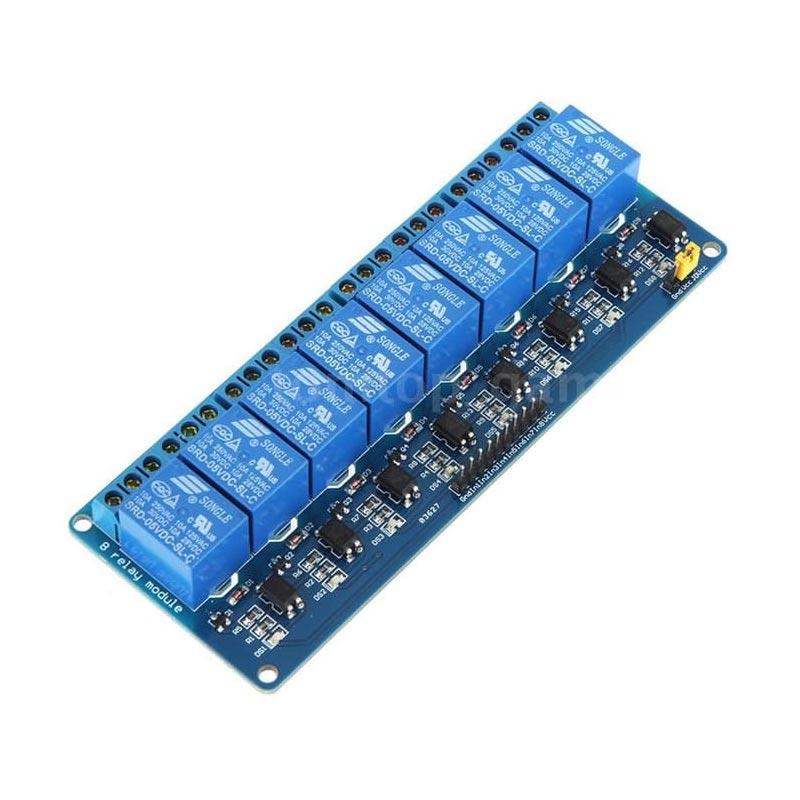
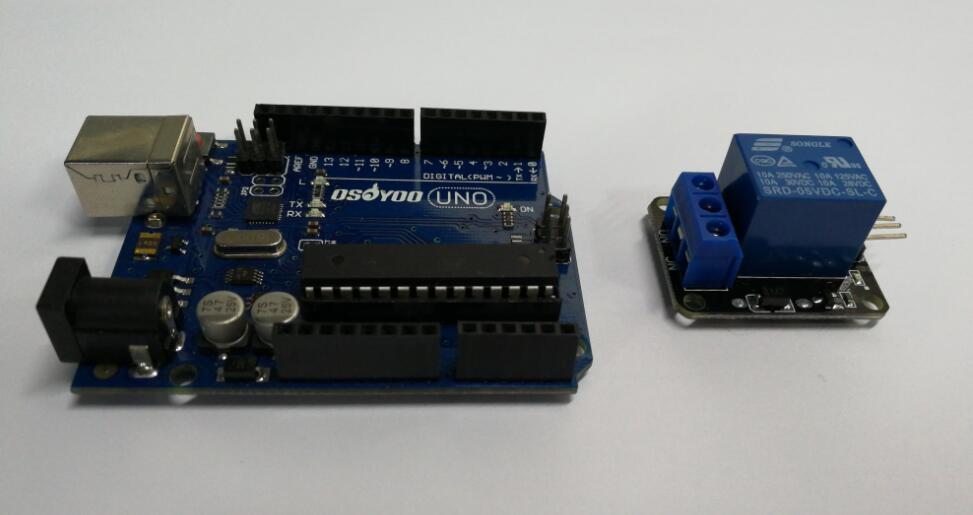
Jual Arduino Songle 5v Relay 8 Channel Module Board For Arduino 5 Volt Original Online Maret 2021 Blibli from www.static-src.com In the past, i used to build a circuit just like the above. Setting d3 therefore turns on the relay and turns. * a relay basically allows a relatively low voltage to easily control higher power circuits. In a previous tutorial, we have learned how to turn on/off an led. Here we are not using any relay driver ic like uln2003 and will only use an npn transistor to control relay. The ratings are usually printed on the relay case. In this article, we are going to control an arduino relay module. We will control two different devices using it.
The arduino can be programmed to turn on the relay when a certain event occurs, for example let's start with seeing how the 5v relay works, then i'll show you how to set it up on the arduino and give.
Unfortunately, you can't as the arduino operates at 5v which means it can't control these higher however, with the help of a relay module to switch the high voltage, you can now use the arduino to. Setting d3 therefore turns on the relay and turns. The arduino can be programmed to turn on the relay when a certain event occurs, for example let's start with seeing how the 5v relay works, then i'll show you how to set it up on the arduino and give. * a relay basically allows a relatively low voltage to easily control higher power circuits. Here we are not using any relay driver ic like uln2003 and will only use an npn transistor to control relay. The ratings are usually printed on the relay case. In this article, we are going to control an arduino relay module. Here, the in pin of the module is attached to d3 of the arduino uno. In this arduino relay control tutorial we will simply learn how to interface a relay with arduino. Controlling a relay module with the arduino is as simple as controlling any other output as we'll see there are other relay modules that are powered using 3.3v, which is ideal for esp32, esp8266, and. You can watch the following video or read the written tutorial below. Most relay modules sold to connect to arduino are power relays and are rated for either 110v or 240v. In a previous tutorial, we have learned how to turn on/off an led.
In this arduino relay control tutorial we will simply learn how to interface a relay with arduino. The arduino can be programmed to turn on the relay when a certain event occurs, for example let's start with seeing how the 5v relay works, then i'll show you how to set it up on the arduino and give. Here, the in pin of the module is attached to d3 of the arduino uno. Controlling a relay module with the arduino is as simple as controlling any other output as we'll see there are other relay modules that are powered using 3.3v, which is ideal for esp32, esp8266, and. In a previous tutorial, we have learned how to turn on/off an led.
Arduino Lesson 1 Channel Relay Module Osoyoo Com from osoyoo.com In this tutorial we will learn how to control high voltage devices using arduino and a relay module. Controlling a relay module with the arduino is as simple as controlling any other output as we'll see there are other relay modules that are powered using 3.3v, which is ideal for esp32, esp8266, and. The ratings are usually printed on the relay case. A relay accomplishes this by using the 5v outputted from an arduino pin to energize the electromagnet. Unfortunately, you can't as the arduino operates at 5v which means it can't control these higher however, with the help of a relay module to switch the high voltage, you can now use the arduino to. Setting d3 therefore turns on the relay and turns. First we will control a simple led then we will control a light bulb using it. Notice that the maximum dc voltage that can.
Here, the in pin of the module is attached to d3 of the arduino uno.
In this tutorial we will learn how to control high voltage devices using arduino and a relay module. In this arduino relay control tutorial we will simply learn how to interface a relay with arduino. Most relay modules sold to connect to arduino are power relays and are rated for either 110v or 240v. In this article, we are going to control an arduino relay module. Here we are not using any relay driver ic like uln2003 and will only use an npn transistor to control relay. Notice that the maximum dc voltage that can. In the past, i used to build a circuit just like the above. The ratings are usually printed on the relay case. We will control two different devices using it. A relay accomplishes this by using the 5v outputted from an arduino pin to energize the electromagnet. Setting d3 therefore turns on the relay and turns. Here, the in pin of the module is attached to d3 of the arduino uno. First we will control a simple led then we will control a light bulb using it.
Most relay modules sold to connect to arduino are power relays and are rated for either 110v or 240v. You can watch the following video or read the written tutorial below. In this tutorial you learn In this tutorial we will learn how to control high voltage devices using arduino and a relay module. First we will control a simple led then we will control a light bulb using it.
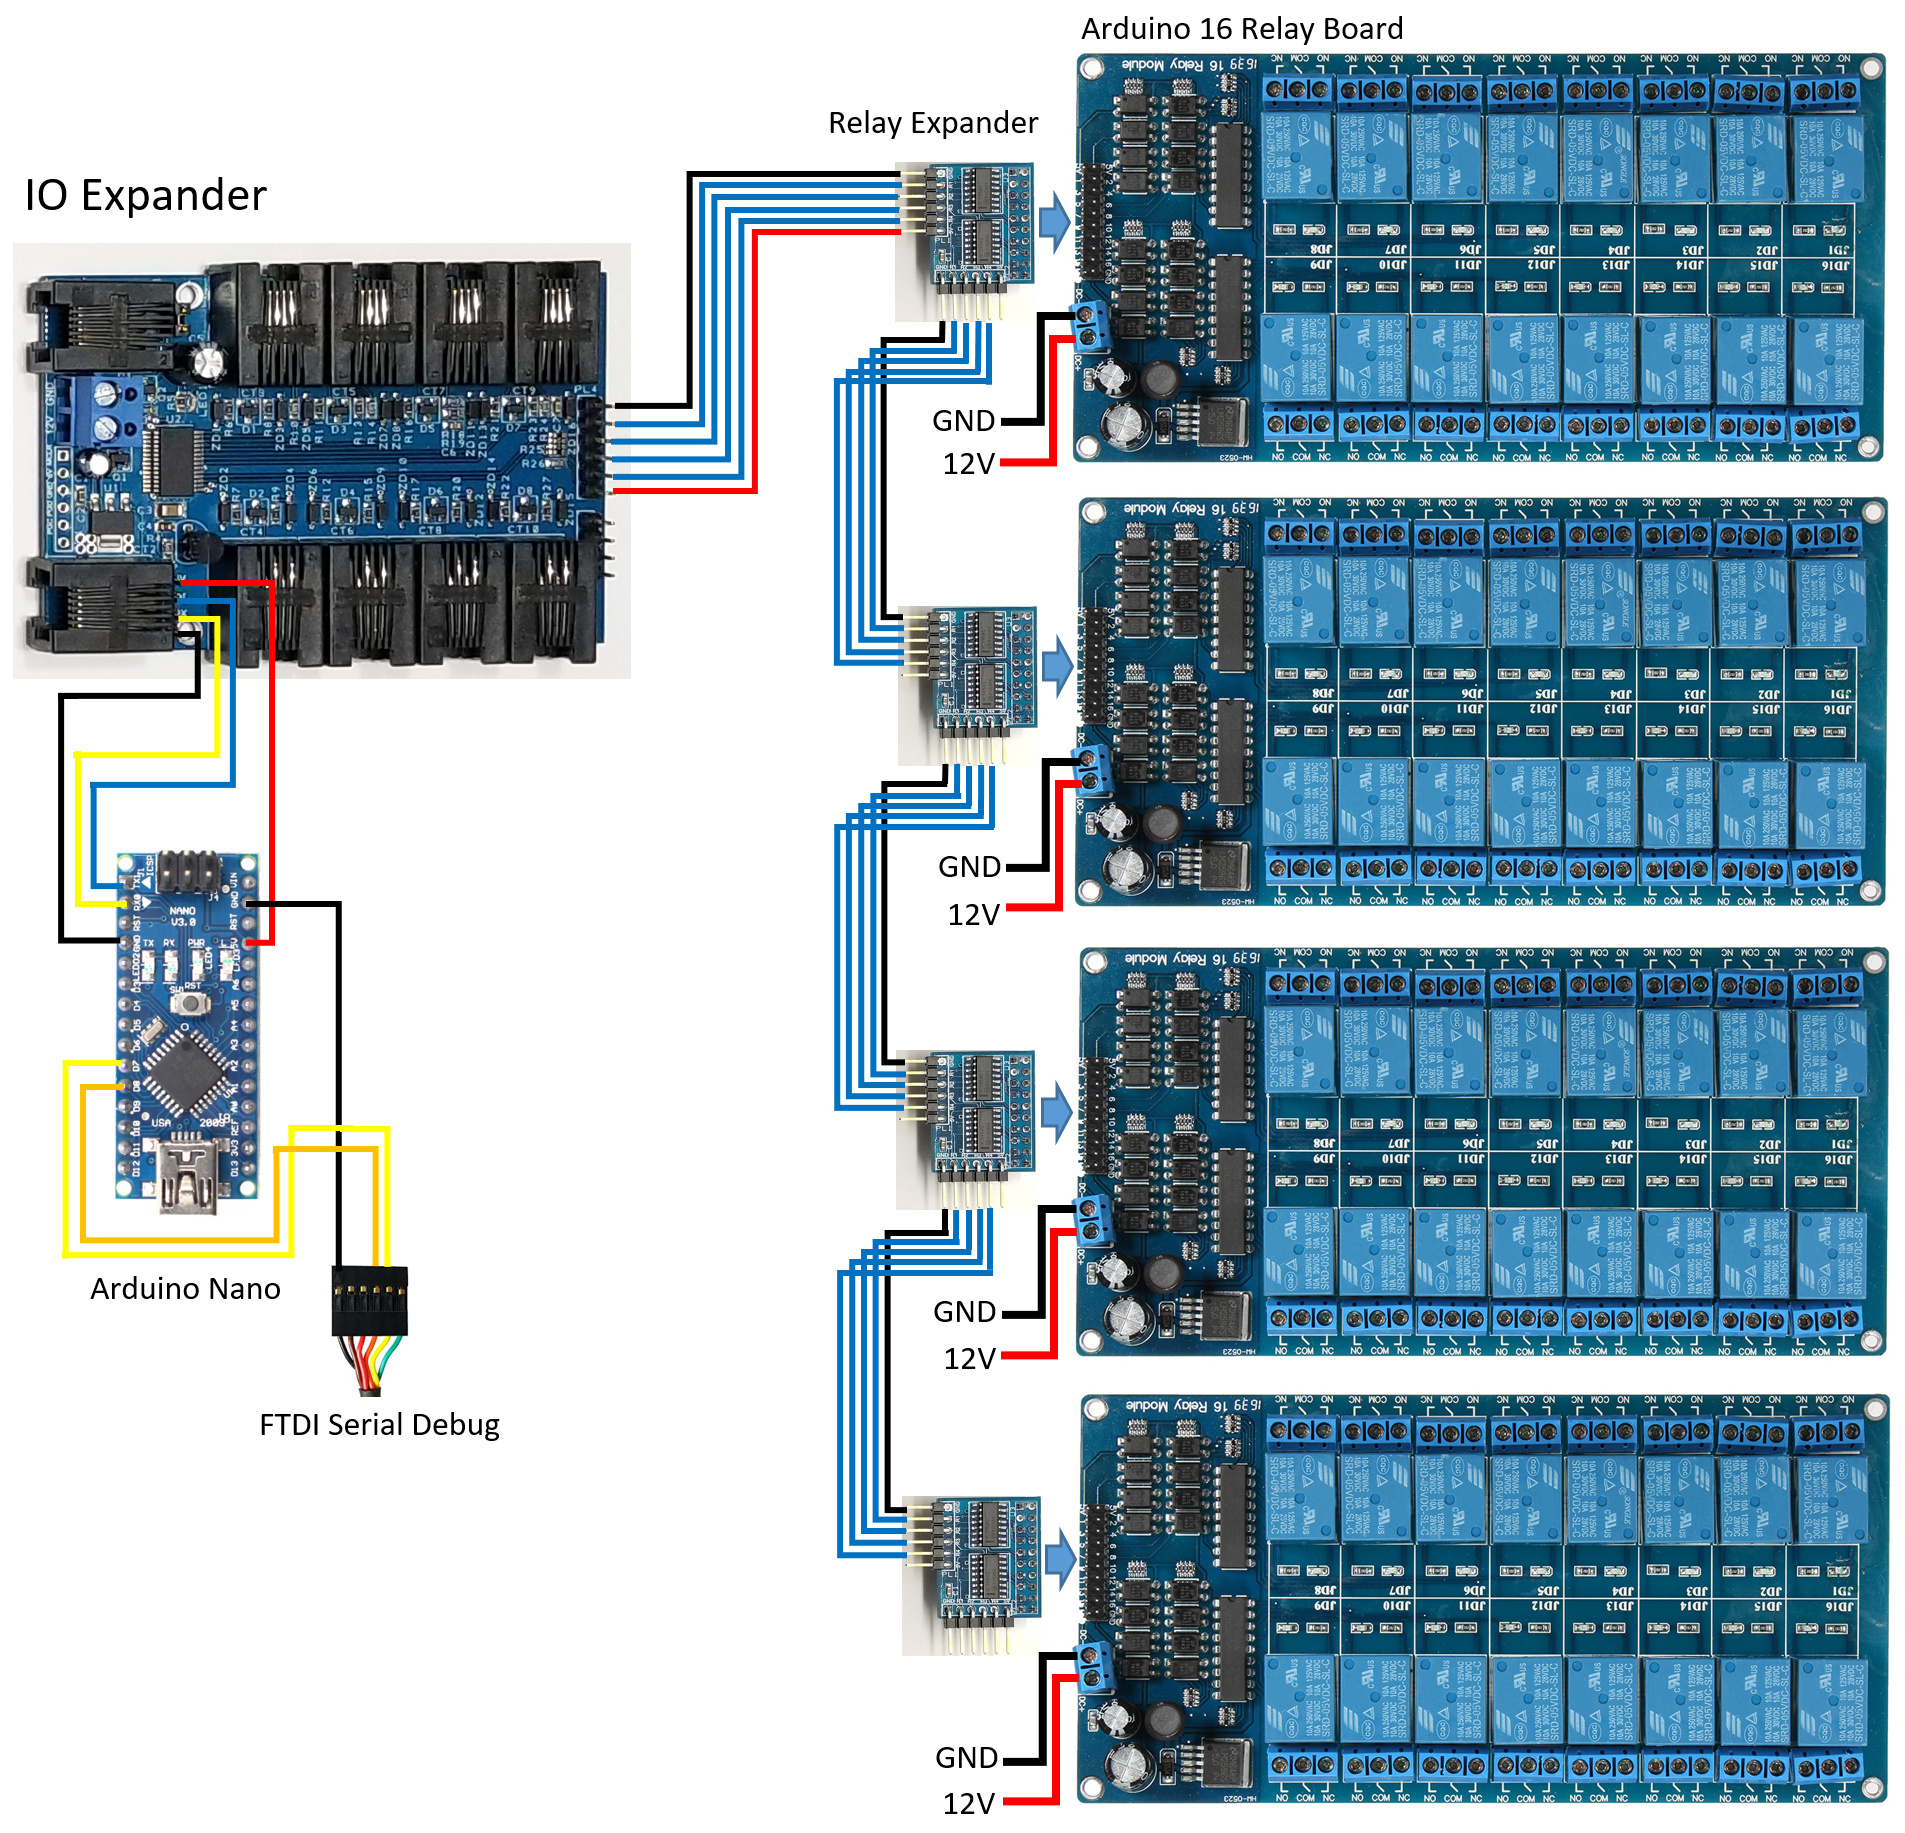
Control Up To 65 280 Relays With Your Arduino Arduino Project Hub from hacksterio.s3.amazonaws.com Here, the in pin of the module is attached to d3 of the arduino uno. Unfortunately, you can't as the arduino operates at 5v which means it can't control these higher however, with the help of a relay module to switch the high voltage, you can now use the arduino to. In this arduino relay control tutorial we will simply learn how to interface a relay with arduino. In this article, we are going to control an arduino relay module. The ratings are usually printed on the relay case. First we will control a simple led then we will control a light bulb using it. Notice that the maximum dc voltage that can. Here we are not using any relay driver ic like uln2003 and will only use an npn transistor to control relay.
The ratings are usually printed on the relay case.
In the past, i used to build a circuit just like the above. Notice that the maximum dc voltage that can. If you use a relay, you can control up to 250v with your arduino, esp8266 or esp32 based microcontroller. A relay accomplishes this by using the 5v outputted from an arduino pin to energize the electromagnet. * a relay basically allows a relatively low voltage to easily control higher power circuits. In this article, we are going to control an arduino relay module. Most relay modules sold to connect to arduino are power relays and are rated for either 110v or 240v. In a previous tutorial, we have learned how to turn on/off an led. You can watch the following video or read the written tutorial below. The ratings are usually printed on the relay case. First we will control a simple led then we will control a light bulb using it. Controlling a relay module with the arduino is as simple as controlling any other output as we'll see there are other relay modules that are powered using 3.3v, which is ideal for esp32, esp8266, and. We will control two different devices using it.
Sea Ray Relays / Cards Complete Day One Of Multi Events At Sea Ray Relays University Of Louisville Athletics / With 8' 6 (2.59 m) beam, the 26' 7 (8.10 m) loa sundancer can be towed. . Sell your sea ray fast with a free photo advert. View & download of more than 97 sea ray pdf user manuals, service manuals, operating guides. The sea ray® sdx® is the floating epitome of time well spent. Lietuvos ieties metikės pergalė jav (1). It currently operates as part of the brunswick boat group, a division of brunswick corporation. You appear to be blocking ads. 1991 sea ray boats values, specs and prices. Sea ray boats is an american manufacturer that produces recreational motorboats. (284 l) of fuel, sea ray's 260 sundancer will take you almost anywhere you want to cruise, or at least anywhere you can drive: Sea ray boats, knoxville, tennessee. Babits Inches Closer To Emu Pole Vau...
Copy Past Surat Notis Berhenti Kerja Seminggu : Notis berhenti kerja : Korang boleh download file ni dalam bentuk.doc ye! . Surat ni aku create time nk berhenti kerja kilang wong engineering. Anda boleh copy paste contoh ini dan ubah sedikit ayat yang bersesuaian dengan surat yang. Surat ni aku create time nk berhenti kerja kilang wong engineering. Contoh surat resignation letter dalam masa 24 jam atau seminggu. Documents similar to contoh surat berhenti kerja notis sebulan. Urat berhenti kerja yang aku create based on format surat rasmi. Di sini dikongsikan surat berhenti kerja yang. Diharapkan pihak tuan dapat mempertimbangkan notis saya ini dan segala jasa baik dan kerjasama dari pihak tuan sepanjang saya berkhidmat di sini amatlah dihargai. I have enjoyed working with. Ini adalah 4 contoh surat berhenti kerja: Format Surat Letak Jawatan from lh3.googleusercontent.com ...


Komentar
Posting Komentar